- The measurement circuit draws power from the power input port and does not require an additional power cord.
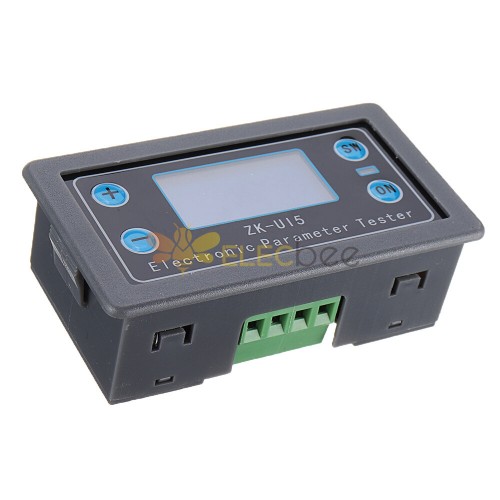
- LCD display, which can display voltage, current, power, discharge mAH, discharge time and operating temperature.
- Complete protection mechanism with various protections such as undervoltage protection, overvoltage protection, overcurrent protection, overpower protection, overtemperature protection, overtime protection and over capacity.
- Overcharge and overdischarge control of the battery can be achieved by setting appropriate undervoltage protection and overvoltage protection thresholds.
- Timed and quantified battery charging and discharging can be achieved by setting appropriate timeout protection and over capacity protection thresholds.
Description:
1, LCD display
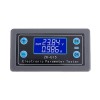
In normal mode, the LCD displays the input voltage and operating temperature on the upside; the downlink shows the real-time current, power, capacity, and discharge time.
In protected mode, the LCD displays the protection code.
In the setting mode, the LCD displays various setting parameter codes and parameter thresholds.
2, sound and light alarm
When the output of the voltage ammeter is turned on, the RUN indicator is always on and the buzzer is not ringing; when it is off, the RUN indicator is off and the buzzer is not ringing. After entering the protection mode, the buzzer will drop the alarm and the RUN indicator will flash.
3, charge and discharge capacity and time automatic statistics, as long as the output is turned on (RUN indicator is always on) to start statistics, turn off the output (RUN indicator is not lit), stop statistics, power-down statistics are automatically cleared, in the display capacity and time When the interface is pressed, long press the button - the corresponding data can be cleared. Please clear the statistics before starting the statistics. The discharge capacity (OAH) and discharge time (OHP) can be set to on or off in the setting mode (default off). After opening, the threshold value can be set. When the threshold is exceeded, the output is automatically turned off and the buzzer alarms. The battery is charged and discharged.
4. By setting the appropriate overvoltage protection threshold and undervoltage protection threshold, the overcharge and overdischarge control of the battery can be realized. For detailed operation, please refer to 4.4 Product Application Example.
5. Perfect software and hardware protection mechanism, and the software protection threshold can be adjusted. After software protection, the output is turned off.
Hardware Protection:
The module input port has anti-reverse protection, and the reverse connection does not burn.
Software protection:
OVP over-voltage protection (default 38V, can be set by yourself, after over-voltage protection, RUN indicator flashes, LCD interface displays OVP. In battery charging, setting the appropriate threshold can effectively prevent battery overcharge);
OCP overcurrent protection (default 5.5A, can be set by yourself, after overcurrent protection, RUN indicator flashes, LCD displays OCP);
OPP over power protection (default 200W, can be set by yourself, after over power protection, RUN indicator flashes, LCD displays OPP);
OTP over temperature protection (default 80 °C, can be set by yourself, after over temperature protection, RUN indicator flashes, LCD shows OTP);
LVP undervoltage protection (default 4.8V, can be set by yourself, after undervoltage protection, RUN indicator flashes, LCD shows LVP, in battery discharge test and other applications, set the appropriate LVP, can effectively prevent battery over-discharge, so as not to damage the battery )
6. The voltage and current meter output is enabled by default.
7, all settable parameters support power-down storage.
Interface Details:
1, the normal mode interface
Note: Short press the button SW to switch the display of current, power, discharge capacity and discharge time of the display. Press and hold the SW button to switch the display of the voltage and temperature of the display. OUT is displayed when the output is turned on, and OUT is not displayed when the output is turned off.
2, protection mode interface
Note: When the parameter measured by the voltage ammeter exceeds the set parameter threshold, enter the protection mode, display the protection code, the output is turned off, the LED light flashes, and the buzzer alarms. In protected mode, press the button ON to exit the protection mode.
3, setting mode interface
Note: In the normal mode, long press the button ON to enter the setting mode. In the setting mode, press and hold the button ON to enter the normal mode.
In the setting interface, short press the button SW to switch the parameters that need to be set. Short press the button + or - to adjust the parameter size. In the display timeout or super capacity interface, short press the button ON to select to turn on or off the timeout protection or over capacity protection. They are off by default.
Application Details:
1. As a voltmeter, ammeter, and power meter, use it in series.
2. Battery charging application, as follows:
Steps for Usage:
2.1. Connect the power module and battery and check if the wiring is correct.
2.2, power on, enter the normal interface .
2.3. Press and hold the ON button to enter the setting interface. The SET is displayed in the lower left corner of the LCD screen.
2.4. Short press the SW button to switch to the parameter interface that needs to be set. Short press + or - button to adjust.
In battery charging applications, the LVP needs to be adjusted below the battery voltage, the is 4.8V. Adjust the OVP to the highest voltage that the battery is allowed to fully charge (this voltage needs to refer to the parameters in the battery manual). Generally, the charging voltage of a 12V lithium battery is 14V. The charging voltage of a general 24V lithium battery is 28V.
2.5. Press and hold the ON button to exit the setting mode.
2.6. Short press the ON button, the indicator light is always on, the output is turned on, and the battery starts to charge.
2.7. If the battery voltage rises to the value set by OVP, the output is turned off, the battery stops charging, the LCD screen displays OVP, the indicator light flashes, and the buzzer alarms.
2.8. If you need timed charging or constant capacity charging, you can set the OHP (timing) or OAP (fixed capacity) parameters in the setting mode. Setup steps: Under the setup interface, short press the SW button to switch to the OHP or OAH interface. Short press the ON button to turn on the timing or constant capacity function. The LCD interface goes from OFF to digital. Press + or - to adjust the parameter size. After setting the parameters,
Press and hold the ON button to exit the setting interface. When the time or capacity reaches the set value, the output turns off and stops charging. The LCD displays the OHP or OAP code, the indicator light flashes, and the buzzer alarms.
3. Battery discharge application, as follows
Steps for usage:
1. Connect the battery and load according to the above diagram and check if the wiring is correct.
2. The voltage ammeter enters the normal interface.
3. Press and hold the ON button to enter the setting interface. The SET is displayed in the lower left corner of the LCD screen.
4. Short press the SW button to switch to the parameter interface that needs to be set. Short press + or - button to adjust the parameter, long press + or - button to make the parameter increase continuously or continuously. In battery discharge applications, the OVP needs to be set above the battery voltage, up to 38V. Adjust the LVP to the lowest voltage allowed by the battery (this voltage needs to refer to the parameters in the battery manual). Generally, the discharge voltage of a 12V lithium battery is 9.2V. 24V. The discharge voltage of a lithium battery is 18.5V.
5. Press and hold the ON button to exit the setting mode.
6. Short press the ON button, the indicator light is always on, the output is on, and the battery starts to discharge.
7. If the battery voltage drops to the value set by LVP, the output is turned off, the battery stops discharging, the LCD screen displays LVP, the indicator light flashes, and the buzzer alarms.
8. If you need a timed discharge or fixed capacity discharge, you can set the OHP (timing) or OAP (fixed capacity) parameters in the setup mode. Setup steps: Under the setup interface, short press the SW button to switch to the OHP or OAH interface. Short press the ON button to turn on the timing or constant capacity function. The LCD interface goes from OFF to digital. Press + or - to adjust the parameter size. After setting the parameters, press and hold the ON button to exit the setting interface. When the time or capacity reaches the set value, the output turns off and stops discharging. The LCD displays the OHP or OAP code, the indicator light flashes, and the buzzer alarms.






0-300x300.jpg)
