准确的细节>>
准确的细节:
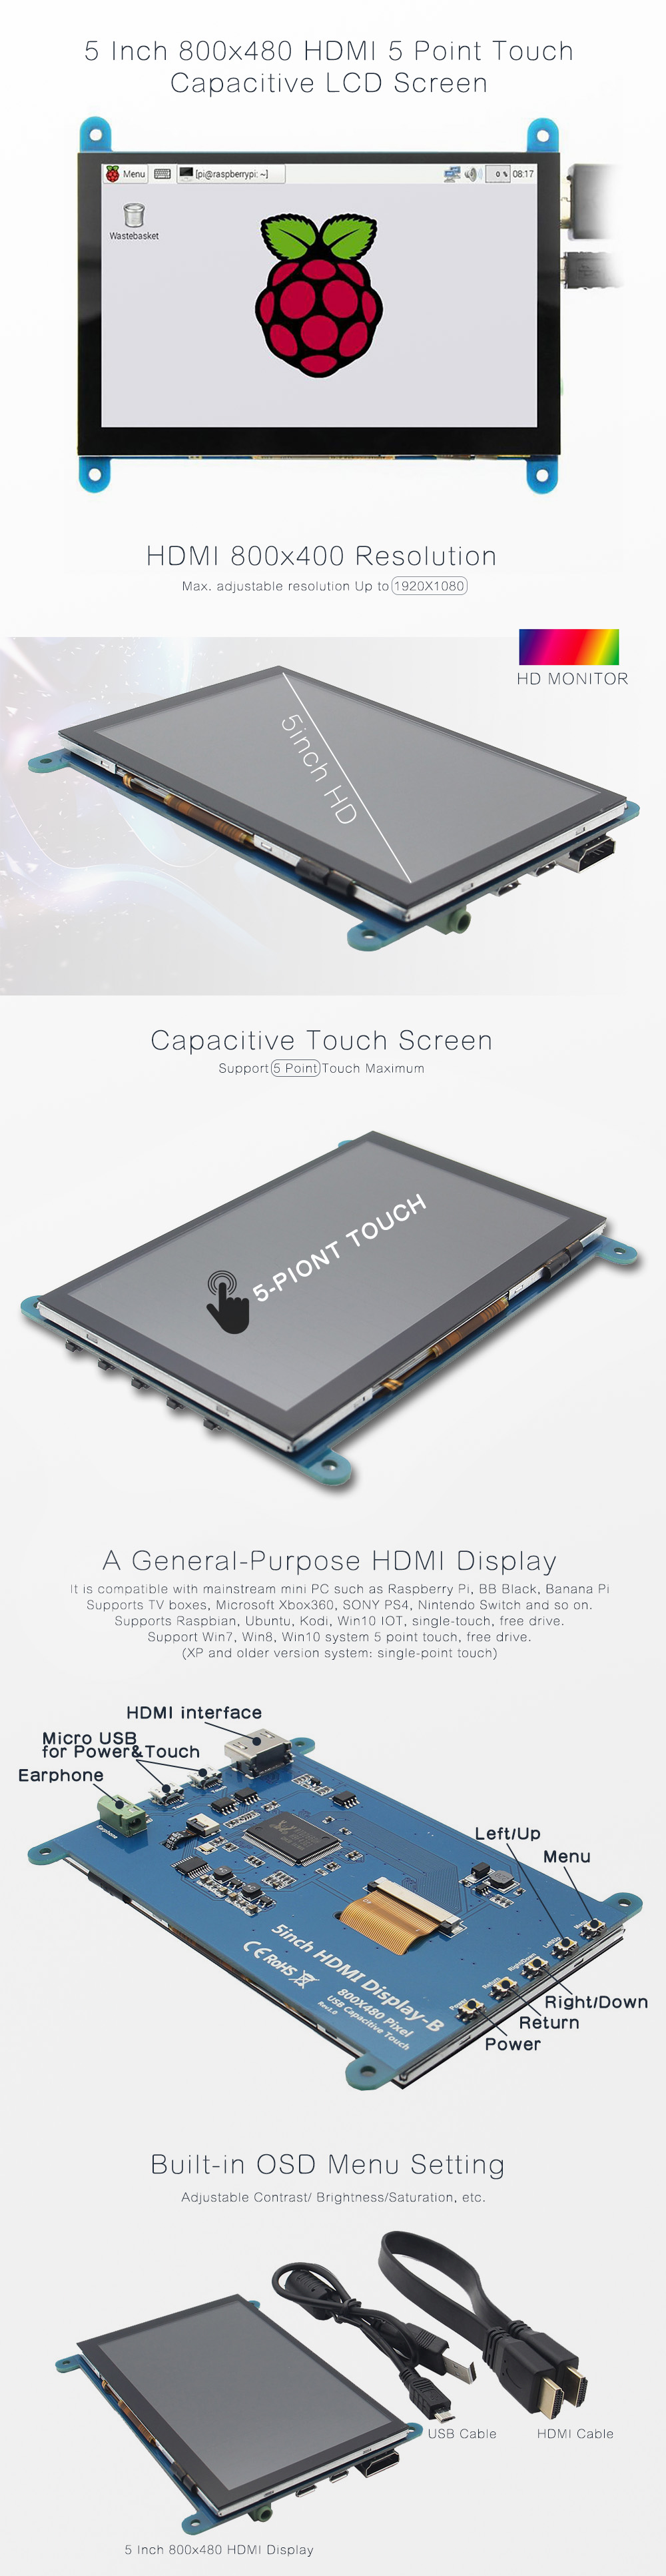
概述:-5" 标准显示器,800x480 分辨率,支持最大 HDMI 分辨率 1920X1080
-Capacitive touch screen,support 5 point touch maximum
-Built-in OSD menu adjustment function (adjustable Contrast/ Brightness/Saturation,etc.)
-It is compatible with mainstream mini PC such as Raspberry Pi,BB Black,Banana Pi
-It can also be used as a general-purpose HDMI display,connecting computers,TV boxes,Xbox360, and so on
-Used as a Raspberry Pi display that supports Raspbian,Ubuntu,K0 di,Win10 IOT,single-touch,free drive
-Work as a PC monitor,support Win7,Win8,Win10 system 5 point touch (XP and older version system: single-point touch),free drive
-支持HDMI音频输出
-Passed CE,RoHS certification规格:尺寸:5.0(英寸)
Resolution: 800x480(dots),支持最大 HDMI 分辨率 1920X1080
触控:5点电容触控
音频输出:支持
尺寸:121.11x95.24(mm)
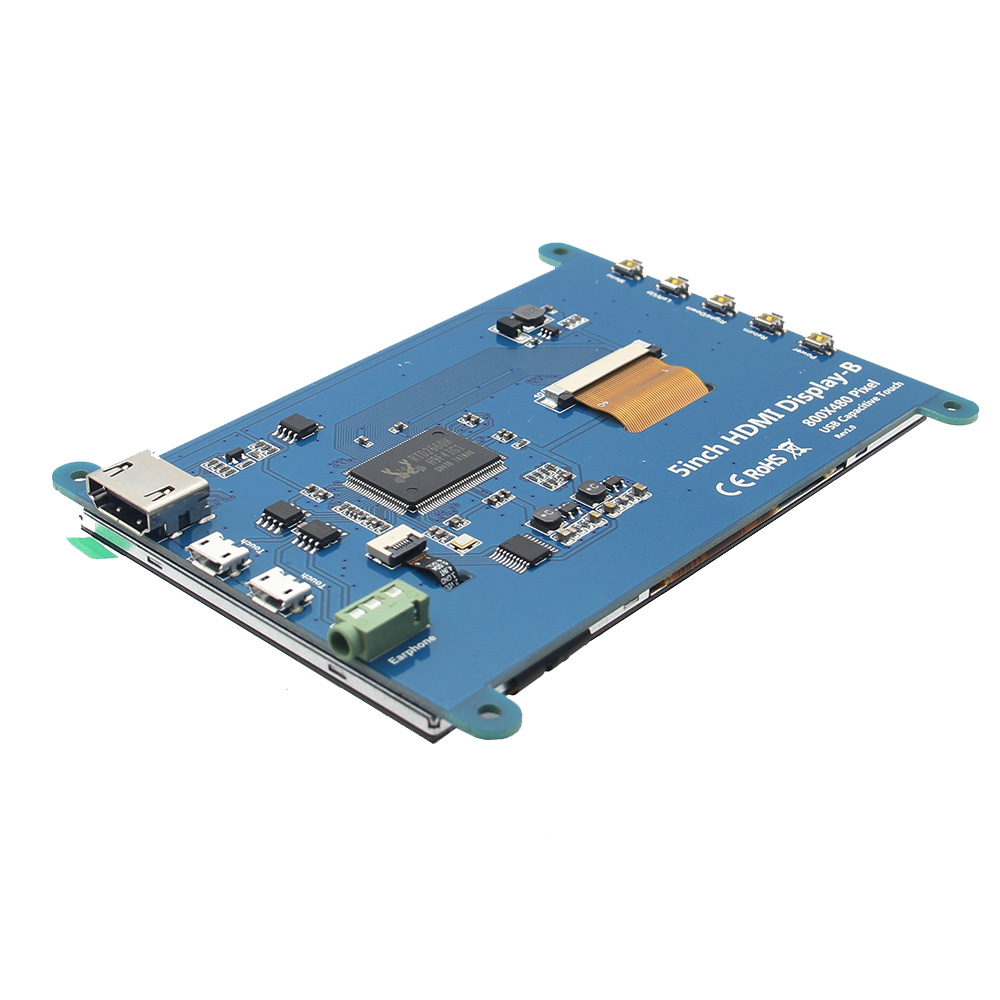
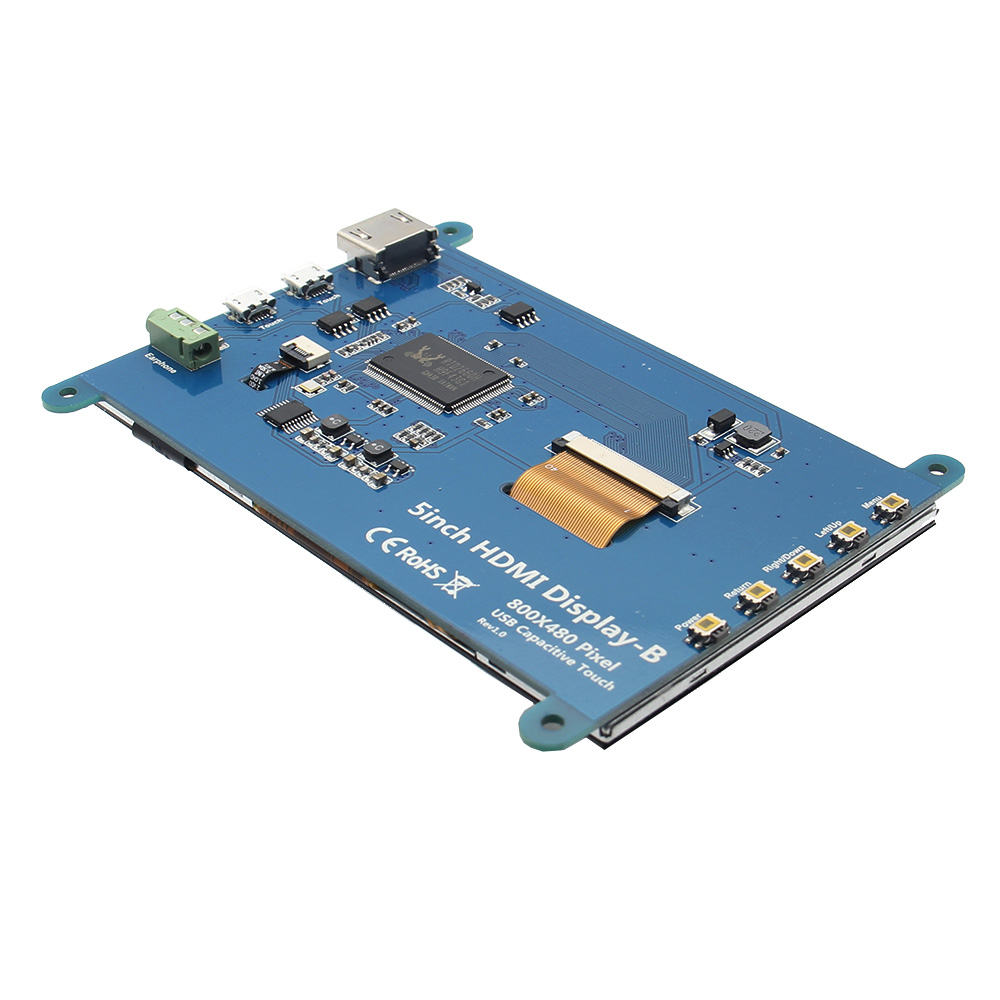
重量:248(克)硬件说明:耳机:3.5mm音频输出接口
Touch: USB connector(For power supply and touch output,the functions of the both are the same,can just use one of them)
显示:HDMI接口(用于连接主板和液晶显示器)
电源:控制背光灯的开启和关闭以节省电量
Return:返回(仅在 OSD 设置菜单中有效)
Right/Down:方向右/下(背光快捷键0
左/上:方向左/上(背光快捷键)
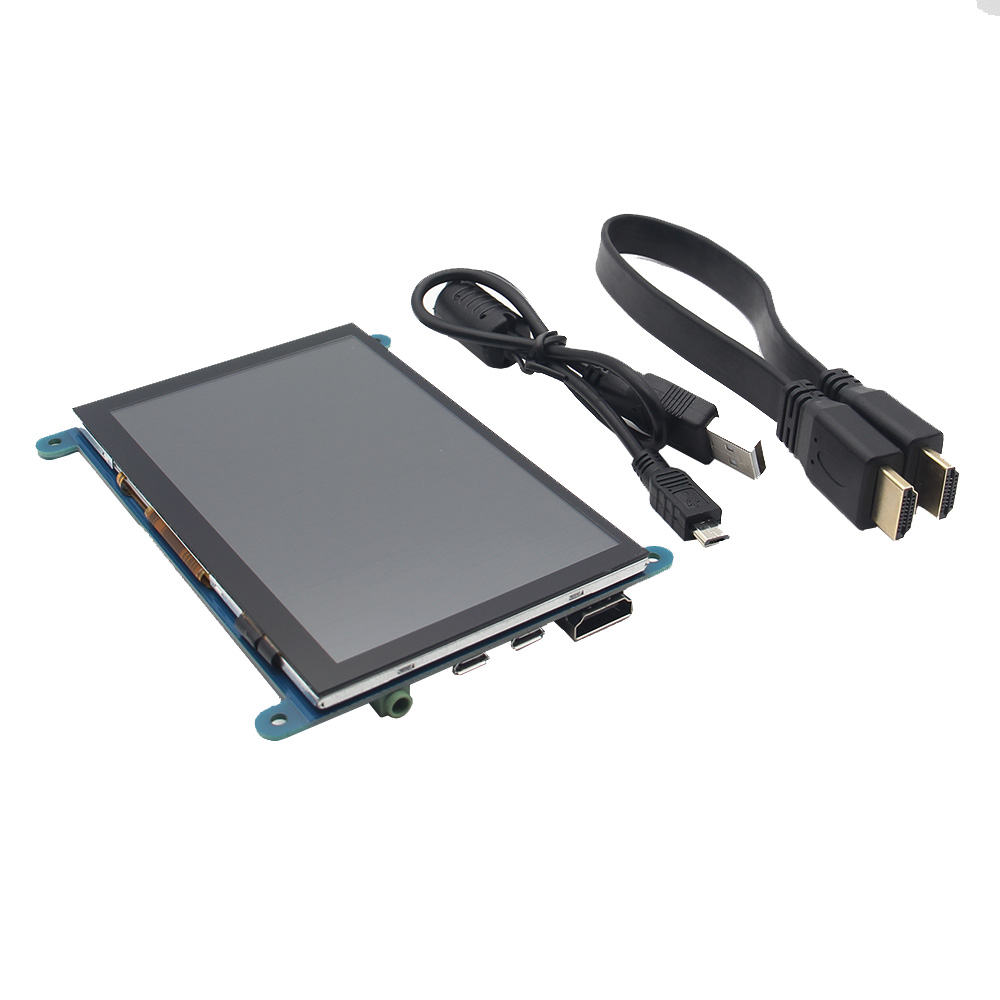
菜单:打开 OSD / 选择键(仅在 OSD 设置菜单中有效)包装包括:1 x 5 英寸 HDMI 触摸屏(带安装螺丝)
1 x HDMI 线(约 31.5 厘米/12.40 英寸)
1 x USB 数据线(约 42.5 厘米/16.73 英寸)
如何与 Raspbian/Ubuntu Mate/Win10 IoT 核心系统一起使用:
第一步:安装 Raspbian 官方镜像
1)从官方下载中下载最新的镜像。
2)按照官方教程步骤安装系统。
Step 2: modify the “config.txt” After the programming of Step1 is completed,open the config.txt file of Micro SD Card root directory and add the following code at the end of the file,save and eject Micro SD Card safely:
max_usb_current=1
hdmi_force_hotplug=1
config_hdmi_boost=7
hdmi_group=2
hdmi_mode=1
hdmi_mode=87
hdmi_drive=1
hdmi_cvt 800 480 60 6 0 0 0
Step 3: Insert the Micro SD Card to Raspberry Pi,connect the Raspberry Pi and LCD by HDMI cable; connect USB cable to one of the four USB ports of Raspberry Pi,and connect the other end of the USB cable to the USB port of the LCD; then supply power to Raspberry Pi; after that if the display and touch both are OK,it means drive successfully (please use the full 2A for power supply).
如何旋转显示方向:
1/ 在“config.txt”文件中添加语句(“config.txt”文件位于/boot):
display_rotate=1 #0: 0; 1:90; 2:180; 3:270
2/保存后重启树莓派。
须藤重启
如何旋转触摸方向:
After the display is rotated,the touch needs to be modified.
1/ 安装 libinput
sudo apt-get install xserver-xorg-input-libinput
2/ Create the xorg.conf. D directory in /etc/x11 / below (if the directory already exists,this will proceed directly to step 3)
须藤 mkdir /etc/X11/xorg.conf.d
3/ 将文件“40-libinput.conf”复制到刚刚创建的目录中。
sudo cp /usr/share/X11/xorg.conf.d/40-libinput.conf /etc/X11/xorg.conf.d/
4/编辑“/etc/X11/xorg.conf.d/40-libinput.conf”
须藤纳米/etc/X11/xorg.conf.d/40-libinput.conf
Find a part of the touchscreen,add the following statement inside,press Ctrl+X to exit,press Y to save.
选项“校准矩阵”“0 1 0 -1 0 1 0 0 1”
5/ 重启你的树莓派
须藤重启
完成上述步骤进行 90 度旋转。
笔记:
0 度旋转参数:选项“CalibrationMatrix”“1 0 0 0 1 0 0 0 1”
90 度旋转参数:选项“CalibrationMatrix”“0 1 0 0-1 1 0 0 1”
180度旋转参数:选项“CalibrationMatrix”“1 0 0-1 1 0 0 1”
270 度旋转参数:选项“CalibrationMatrix”“0-1 1 1 0 0 0 0 1”
如何用作电脑显示器:
使用 HDMI 线将电脑 HDMI 输出信号连接到 LCD HDMI 接口
将 LCD 的 USB Touch 接口(两个 MicroUSB 中的一个)连接到设备的 USB 端口
If there are several monitors,please unplug other monitor connectors first,and use LCD as the only monitor for testing.
-Capacitive touch screen,support 5 point touch maximum
-Built-in OSD menu adjustment function (adjustable Contrast/ Brightness/Saturation,etc.)
-It is compatible with mainstream mini PC such as Raspberry Pi,BB Black,Banana Pi
-It can also be used as a general-purpose HDMI display,connecting computers,TV boxes,Xbox360, and so on
-Used as a Raspberry Pi display that supports Raspbian,Ubuntu,K0 di,Win10 IOT,single-touch,free drive
-Work as a PC monitor,support Win7,Win8,Win10 system 5 point touch (XP and older version system: single-point touch),free drive
-支持HDMI音频输出
-Passed CE,RoHS certification规格:尺寸:5.0(英寸)
Resolution: 800x480(dots),支持最大 HDMI 分辨率 1920X1080
触控:5点电容触控
音频输出:支持
尺寸:121.11x95.24(mm)
重量:248(克)硬件说明:耳机:3.5mm音频输出接口
Touch: USB connector(For power supply and touch output,the functions of the both are the same,can just use one of them)
显示:HDMI接口(用于连接主板和液晶显示器)
电源:控制背光灯的开启和关闭以节省电量
Return:返回(仅在 OSD 设置菜单中有效)
Right/Down:方向右/下(背光快捷键0
左/上:方向左/上(背光快捷键)
菜单:打开 OSD / 选择键(仅在 OSD 设置菜单中有效)包装包括:1 x 5 英寸 HDMI 触摸屏(带安装螺丝)
1 x HDMI 线(约 31.5 厘米/12.40 英寸)
1 x USB 数据线(约 42.5 厘米/16.73 英寸)
如何与 Raspbian/Ubuntu Mate/Win10 IoT 核心系统一起使用:
第一步:安装 Raspbian 官方镜像
1)从官方下载中下载最新的镜像。
2)按照官方教程步骤安装系统。
Step 2: modify the “config.txt” After the programming of Step1 is completed,open the config.txt file of Micro SD Card root directory and add the following code at the end of the file,save and eject Micro SD Card safely:
max_usb_current=1
hdmi_force_hotplug=1
config_hdmi_boost=7
hdmi_group=2
hdmi_mode=1
hdmi_mode=87
hdmi_drive=1
hdmi_cvt 800 480 60 6 0 0 0
Step 3: Insert the Micro SD Card to Raspberry Pi,connect the Raspberry Pi and LCD by HDMI cable; connect USB cable to one of the four USB ports of Raspberry Pi,and connect the other end of the USB cable to the USB port of the LCD; then supply power to Raspberry Pi; after that if the display and touch both are OK,it means drive successfully (please use the full 2A for power supply).
如何旋转显示方向:
1/ 在“config.txt”文件中添加语句(“config.txt”文件位于/boot):
display_rotate=1 #0: 0; 1:90; 2:180; 3:270
2/保存后重启树莓派。
须藤重启
如何旋转触摸方向:
After the display is rotated,the touch needs to be modified.
1/ 安装 libinput
sudo apt-get install xserver-xorg-input-libinput
2/ Create the xorg.conf. D directory in /etc/x11 / below (if the directory already exists,this will proceed directly to step 3)
须藤 mkdir /etc/X11/xorg.conf.d
3/ 将文件“40-libinput.conf”复制到刚刚创建的目录中。
sudo cp /usr/share/X11/xorg.conf.d/40-libinput.conf /etc/X11/xorg.conf.d/
4/编辑“/etc/X11/xorg.conf.d/40-libinput.conf”
须藤纳米/etc/X11/xorg.conf.d/40-libinput.conf
Find a part of the touchscreen,add the following statement inside,press Ctrl+X to exit,press Y to save.
选项“校准矩阵”“0 1 0 -1 0 1 0 0 1”
5/ 重启你的树莓派
须藤重启
完成上述步骤进行 90 度旋转。
笔记:
0 度旋转参数:选项“CalibrationMatrix”“1 0 0 0 1 0 0 0 1”
90 度旋转参数:选项“CalibrationMatrix”“0 1 0 0-1 1 0 0 1”
180度旋转参数:选项“CalibrationMatrix”“1 0 0-1 1 0 0 1”
270 度旋转参数:选项“CalibrationMatrix”“0-1 1 1 0 0 0 0 1”
如何用作电脑显示器:
使用 HDMI 线将电脑 HDMI 输出信号连接到 LCD HDMI 接口
将 LCD 的 USB Touch 接口(两个 MicroUSB 中的一个)连接到设备的 USB 端口
If there are several monitors,please unplug other monitor connectors first,and use LCD as the only monitor for testing.

 登录
登录 0
0
 ,
, ,
, ,
, ,
, ,
,